If you’ve got an idea for a website you want to build and not feeling too savvy or don’t have enough time for website design, no need to take a course as WordPress maybe the answer you’ve been looking for. WordPress is an easy to use program that can make it possible to easily and quickly set up a site and maintain it so that we can see your creative flare shine. To help you out with getting start, we’ve arranged a helpful guide from registering the account all the way to finishing the WordPress installation so that you can easily get to the enjoyable process of bringing your website to life.
Step 1

Go to the Doteasy Main Page and give “Sign Up” a click.
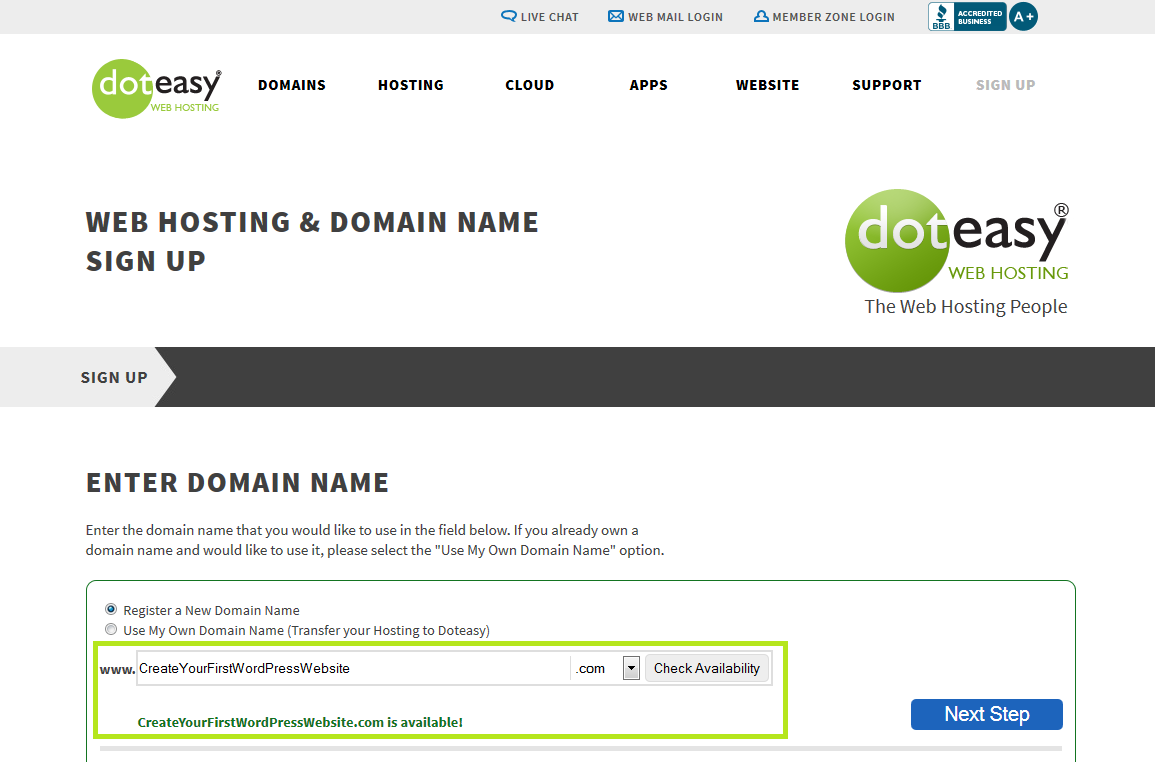
In order to create a website, you’ll need a domain name (www.website.com) to start with.
If you don’t have a domain yet, you can easily enter your desired domain name in the text box and click the “Check Availability” to see what extensions (.com, .net, .org, etc.) are available. When you find your desired domain is available for registration, you can proceed by clicking the “Next Step” button.
If you already own a domain with another domain registrar, you can simply choose the “Use My Own Domain Name” option to transfer the domain to us.

WordPress requires the languages PHP and MySQL in order to be set up and work correctly. As such, you will want to choose our “Unlimited SSD Hosting” plan when you are on the “Hosting Plan” page. The Unlimited SSD Hosting plan is good for websites of any size as it will provide resources for your current site, but for future updates as well as your site grows and becomes more popular. The Unlimited SSD Hosting plan utilizes web servers that are fitted with SSDs rather than conventional hard disk drives (HDD) and is optimized for database-driven websites such as WordPress and eCommerce websites. SSDs provide much higher input/output (I/O) speeds compared to traditional HDDs. This means that SSDs can read and write data much faster, which greatly boosts the speed at which data is access from your website and databases.
For those of you with more then one domain name, the Unlimited SSD Hosting plan allows you to set up add-on domains that can share the same Unlimited SSD Hosting plan without additional hosting costs. Another great benefit for subscribing to the Unlimited SSD Hosting plan is that you can enjoy the 1st Year Introductory price for only $4.95/mo and the domain name (value $15) is already included in the plan. To enjoy the full benefits of this offer, you will want to sign up for the 1-Year Unlimited SSD Hosting Plan.
There are additional features we offer that you can choose to subscribe to (e.g. Automated Daily Site Backup, Spam & Email Virus Protection, etc.) and you can click the “Learn More” icon for each feature to understand the benefits of these features. If you’re unsure of whether a feature is right for you, don’t hesitate to contact us for more information, or you can always choose to set up the additional feature at a later date.

Scrolling down, you’ll see the sections for “Contact Info”, “Login Info”, and “Payment Info”. Simply fill out the requested information in each section. You’ll want to make sure you keep a record of your login Username and Password you set up here as you’ll need them to install WordPress in a later step. Lastly, make sure to check the “Agreement” section at the bottom and go over to application to make sure that all of the information entered is correct before submitting.

You’ll see a confirmation page once you have submitted your application thanking you for the submission and that it was received. A confirmation email will later be sent to confirm once the account is set up and ready for use.

Once your account is activated, go to the Member Zone to access your account. Login with the Username and Password you created when setting up the account earlier. You’ll be prompted with a “New Billing Options and Discounts” page to confirm you signed in correctly. This page shows more information about our hosting plans and will automatically proceed to the next screen after 30 seconds. You can click the “Continue to sign in” button to proceed to the next page on your own if you prefer.

In the Member Zone area you will find many services and features that can be accessed by your account. You can take a moment to look at additional features you can subscribe to and when ready, can click on the link “Site Admin Panel (cPanel)”.

Once you are in the Doteasy Control Panel (cPanel), you’ll want to scroll down to “Doteasy Softaculous Apps Installer” section. Here you will see many scripts you can easily install on your account including WordPress. You will want to click on WordPress to launch the program.

On the Softaculous App page, you are provided with more information towards the application that you are choosing to install such as demo’s, links to the creator(s) site as well as further information and reviews. You can continue with the WordPress installation by clicking on “install” in Blue near the top.

This will take us to the installation page for WordPress where we need to actually set up the program settings. You can leave Protocol as http:// as seen and choose the domain name you wish to install WordPress to. As mentioned earlier, Doteasy’s Unlimited SSD Hosting Plan offers the unlimited add-on domain option. This means that for those of you who have more than one domain in the account, you will have the option to choose which domain you want to install WordPress to.
Moving on you will see “In Directory” which asks you what directory or folder you wish to install WordPress to. For example, if you want your WordPress site to appear at www.Website.com/blog, you will want to type out ‘blog’ in this field. Leaving this field blank will install WordPress to the main domain or using the previous example, www.Website.com.

For the Database Settings, you can customize the database name and table prefix if you wish, however the installer will help generate a name for these automatically if you are unsure of what to put. “Site Setting” allows you to customize the default information that is shown on your site when it is installed. You can place a site name, and description that will show up after installation is completed, but can be changed anytime later on directly through WordPress itself. The “Enable Multisite” option is not required for most users and we would recommend you to not select this option unless you are comfortable with working with WordPress or websites in general.
We would like to highlight the Admin Account section next as this is an important section of the installation. The admin username is used to login to your WordPress once the setup is complete and we would strongly recommend you to avoid using “admin” as the username as this is commonly targeted by hackers. It is important to choose Strong (upper case, lower case and numbers) username and password combinations to help increase your sites security. Make sure that you keep a copy of the information you have set up including the username and password, or enter your email address into the last field on the form to have it email you. Once you’re ready to continue, click “install” and watch it quickly finish the rest for you.

Once it’s installed, you’ll see this “Congratulations” page. On the “Congratulations” page you’ll see two links. The first is the actual WordPress website link where your site is visible. The second is the Admin Login page that you’ll use to create the site with. You’ll want to click on the second link to visit the Admin Page to get started on making the site come to life.

With your WordPress site installed, you can access the Dashboard (main area of WordPress) by logging in here. You can reach this screen at any time by going to www.Website.com/wp-login.php and then enter the username and password that you created in step 11.

Once logged in, you are now in the Dashboard page and this is where the journey begins to create your website. From here, you can do everything including: creating pages, customize layout by installing/changing themes, enhance functionalities of the website by installing plugins, and much more. Check out our Knowledgeable Base for more resources.
Posted in: Beginner's Guide